KC3CIB is creating an email group list for future Skeds (schedule) on some of the bands If you want to be included in the list, please email KC3CIB (see qrz)
Category: Uncategorized
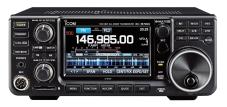
RT #200 SPECIAL EVENT
200th session of the RT SPECIAL EVENT THE 200th Session of the RT! Join Joe, W3GMS, as he hosts the Thursday Night RT on 146.985, Thursday @ 830 pm Eastern Time. Check out the new forum https://w3gmsrepeater.forumotion.com 146.985- MHz; TX PL 100.0 RX PL 94.8 (RX PL is NOT required, Optional) Technical questions can be asked during … Continue reading RT #200 SPECIAL EVENT
Taking down a 60′ one piece tower – photos
Photos of removal of a 60 ft one piece tower. Thank you for all those that came out to help W3NTB, the new proud owner. click here: 985 Repeater users in action
Cheap Portable Multi-band Antenna by K3DZM
Article submitted by K3DZM While pondering a portable antenna the other night, I decided I wanted to build such a beast with parts that were staring me in the face! It was partly an antenna in theory with material creativity mixed in. The antenna was not designed to be a permanent outside antenna, since the materials in … Continue reading Cheap Portable Multi-band Antenna by K3DZM
RST Reports and How To Give Them
RST REPORTS AND HOW TO GIVE THEM This guide is for HF. For giving signal reports on a repeater see: Giving Signal Reports when going thru a Repeater What Does RST mean? How do I give a proper RST report? The acronym RST stands for: Readability – Signal Strength – Tone If you’re operating phone or voice, you’ll … Continue reading RST Reports and How To Give Them
Why Open Wire Fed Dipoles Need To Be Balanced
It is important, if you're using a dipole antenna fed with open wire line feeders, to try and keep the antenna balanced. The first rule is to make sure both sides of the antenna are the same physical length. Sometimes, even when doing that, the antenna will not be balanced due to the asymmetrical issue. … Continue reading Why Open Wire Fed Dipoles Need To Be Balanced
Giving Signal Reports when going thru a Repeater
Tech Tip #1 Giving signal reports when going through a repeater by W3GMS on Sun 16 Feb 2020 - 13:22 Keep in mind, when your working a station on the repeater and he is changing his output power, giving an "S" meter report really does nothing. Your "S" meter is listening to the repeater and due to … Continue reading Giving Signal Reports when going thru a Repeater
Does it matter how long my coax line is?
Does it matter how long my coax line is? Ideal world: No. Real world: Very possibly. Unless you have a near-perfect 1:1 SWR at the antenna or unless you're intentionally making a feedline-based matching system, you do not want your feedline to be a quarter wavelength long at your operating frequency or any ODD multiple … Continue reading Does it matter how long my coax line is?
Increase in Repeater Activity
Here is proof of the increased activity on 985! Graph is showing KWh per month. Let's make 2020 the most Joe has ever paid for electric! 146 KWh
Mobile Antenna Placement Effects
Found this on Larsen's updated website. Diagram showing different antenna placements on a mobile and the corresponding losses. https://pulselarsenantennas.com/wp-content/uploads/2017/05/Amateur_Radio_PulseLarsen.pdf 73 de K3DBI

You must be logged in to post a comment.